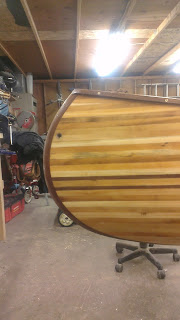
The process for this is interesting. My brother had done this before, so he said to draw all over the canoe with a black marker. Once the marker is sanded off, you know you got that spot! This seems to work well. With wet sanding, it has hard to tell where you have sanded and where you haven't....so with the marker, it makes it easier to figure this out, and gives you an idea of how long to sand in each spot.
It's an easy enough step, but afterwords the canoe looks kind of dull. I was very excited to get that first coat of varnish on and make it shiny again!
I deffinately learned while sanding that next time I need to be a little bit better with the runs in the resin! For the most part, I didnt have any that were too bad...I had some bad runs when I put on the wet gunnells. I think I went to bed as soon as i put them on when I should have checked for sagging resin for a half hour or so which would have save me TONS of time with sanding! This was the time though to sand out any runs in the resin and make it nice and smooth for the varnish. The inside took quite a bit longer with the concave shape, and its easy to tell yourself it wont matter once you start sliding around your Duluth Packs, but I kept telling myself that the inside was all I would be staring at on the canoe as I paddled mile after beautiful mile!
At this point, I realized I had a couple of things to finish up on the hull still. I wanted to add the hole for connecting a rope onto the canoe, and I wanted to add a plaque with my name saying that i built the canoe. I think both of these ideas came from Gilpatrick's canoe making book. The plaque was printed onto a regular sheet of white computer paper. I played around with it a few different times, but finally figured out how to get it onto the hull, and looking somewhat transparent and "natural". I put a thin layer of resin on the canoe where I wanted the plaque to go. For me, i put it on the inside, down low behind the rear seat. I wanted it to be something that you could easily show off, and yet something you wont be looking at all the time. So with the thin layer on the hull, I also put a thin layer on the backside of the oval piece of paper. I then positioned it on the hull how i wanted, and used my squeegee to press out the bubbles and keep it in place. A second coat of resin over the top the next day and it was all done!
For the holes for the ropes, I used a 1/2 inch piece of copper pipe. I drilled a 5/8 inch hole from both sides and put the piece of copper through the hull and inner stems for good strength. I then used a pencil to trace a flush line on each side, pulled the pipe back out, and cut it off flush with the pencil lines with a hacksaw. After i made sure everything was ok, I cleaned up the burrs with a wire wheel, and epoxied them into place!
The seem to work great, and I love how simple and clean they look.


No comments:
Post a Comment